Sunday, July 15, 2012
NEW POST--COMING SOON!!
Okay, I know I have been slacking a bit, but, I made a muffin this morning from a recipe my mom found on Pinterest (I am addicted to it!!) and it was YUMMY, so, I will post it and any tips and tricks I have for you when making them. So, expect that to come soon!! I will also post a link to the actual recipe I found so you can use it, seeing as they deserve the credit for it for coming up with it in the first place!!
Tuesday, June 19, 2012
Happy 50th Anniversary
Okay, so here is my new cake! I made this for my grandparents surprise 50th Anniversary party. So here it is!


I made everything except the gold ribbon around the bottom, the 50 topper and the cardboard (duh). Now some tips for those making anything like this.
Tip #1 : Bake the cakes and as they cool (take out of pan before they cool too much or they will stick to the pan!!) make the flowers.
Tip #2 : Practice making the flowers before you make the cake, Practice, practice, and more practice.
Tip #3: Buy a gum paste flower making kit ( I recommend one by Wilton, you can get it at Michael's )
Tip #4: Research how others make the flowers. I found a couple different ways to make one type of flower so do the research on the flower you plan on making. Also, try to make it as real as possible (unless making a more cartoon style cake or something)
Tip #5 : Buy some sort of tool kit for making cakes (Again, Wilton has some really nice ones)
Tip #6 : Buy premade gum paste and fondant. It will save you tons of time!!
This cake would be for more elegant events and for more advanced people, but, if you follow my tips, you can do it, just make sure you practice, even on smaller cakes before you do this type if need be. If you have any questions just comment and I will get back to you as soon as possible. (:
Sunday, June 17, 2012
Hello!
New post will be up this week, it wont be as detailed or have as much a 'how to' thing to it though. It's mostly to just show, but I do have some tips for if you want to make something like I made. A tip for now- practice, practice, and practice!!! Will post sometime in this upcoming week! I promise (:
Tuesday, June 12, 2012
Carrot Cake made FANCY (:
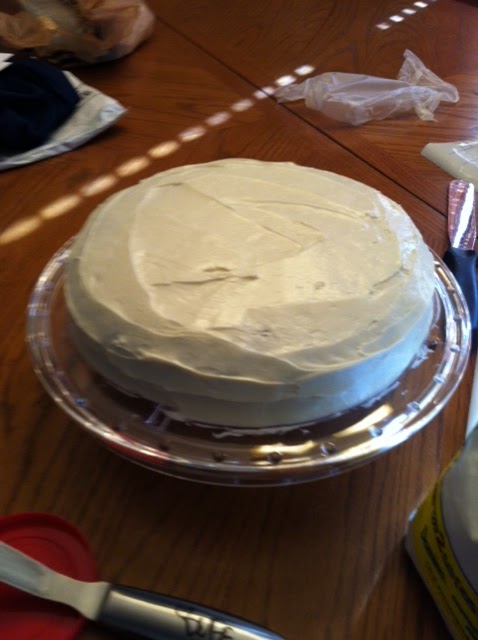
Well, here is a new post! I made a carrot cake with cream cheese frosting and a new 'fondant' recipe, it's super simple and tastes great! (Although, tips to come on how to work with it!)
Here are the ingredients you need : Your favorite Carrot Cake Mix (I used box because that's a lot of work to make it by scratch, but you can if you want!), Cream Cheese Frosting, 12 oz. White chocolate candy melts, Light corn syrup, and corn starch.
Okay, I started making the fondant because you have to let it sit for an hour. (This is NOT my recipe, I tried it from the Better Homes and Garden magazine)

Step 1: Melt the bag of White Chocolate Candy Melts by cooking for 20 seconds at a time, DON'T COOK TOO MUCH! Stir after every 20 seconds until melted, don't over do it!! **Tip: It should take about 1 minute in total**

Step 2: Mix with 1/3 cups light corn syrup in a separate bowl and cover with plastic wrap TIGHTLY and let sit on the counter for at LEAST an hour.
***To color will come later!***
Now, make the carrot cake following the instructions on the back. Put it in your pan, I used a ten inch round pan, so baking time differs, but the back of the box should say depending on your pan. If not, then bake for 10 minutes and check by inserting a tooth pick in the middle, if it comes out clean then it is done. If not, then keep cooking it for about 5 minutes and check it again. I used a ten inch round and it took roughly 20 minutes. But keep with the ten minute and then five at a time tip.
Once done baking, take it out of the pan **Careful! Pan will be HOT** You can let it cool before you do this, but don't let it cool completely, or it will stick to your pan! That is why I do it as soon as it's done. Let the cake cool COMPLETELY now.

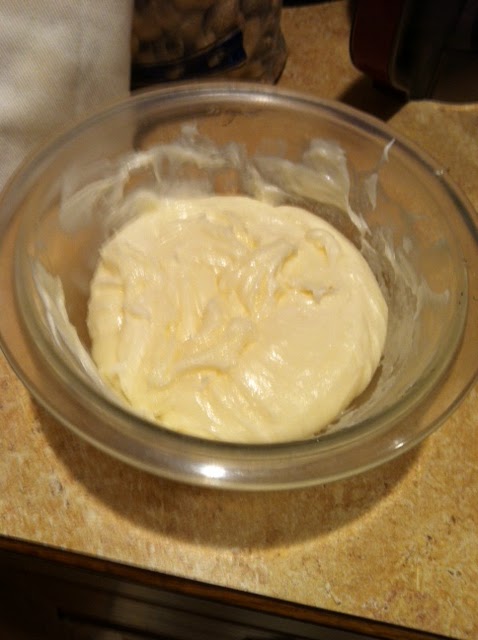
Once that is done cooling, cover the top and sides in the cream cheese frosting and set aside. Time to cover in the candy clay/fondant!
Place the candy clay on a lightly dusted corn starch surface, I use a wilton rolling mat. Knead it until it's nice and pliable, but not too much, remember, it's still chocolate so it can melt and get sticky!! (Thats why I use corn starch, keeps it from being sticky if used right!). Now, if you want to color it, use a tooth pick and add a little at a time and knead it until fully mixed, and keep adding until you get the shade you want. You don't have to color it, I didn't.
Roll it out on the corn starch dusted surface until it is thin. Now comes the harder part. This took me two tries. If it's too warm and you played with it too much, it may tear, so, BE PATIENT! You get frustrated and flustered, it won't work. At all. Trust me, I know that first hand. Once rolled, I used a icing spatula and took it and scraped under the candy clay because it may have stuck a little. I used both arms (don't be afraid to get dirty!!) and lifted it and QUICKLY centered and laid it on the top of the icing covered cake.

Now, this part you also need to go quickly. Cut off any extra pieces or it will weigh it down and tear. Smooth it down on the icing, trying to not get any seams. I have a wilton fondant smoother tool and use it, I love it, works GREAT! Especially for the sides of the cake. Anyway! after smoothing it, trim the sides again, making sure it's as close to the bottom as possible. Now, the decorating part is up to you! I just added little things from this mold I have to just test it out. I wanted to see how well it worked so I just kinda placed some things here and there.

I stuck my cake in the fridge and it was still alright, the chocolate does have the syrup in it so it doesn't completely become solid. Note: If you make a larger cake, double the one and a half the recipe for the fondant/candy clay.


NOTE: I know my writing may not be the best, I am not a fancy published author or anything so, if you have questions, feel free to comment! I don't bite! I will answer! Or just comment to comment, let me know if you tried it and how it went!! (:
Thanks! See you next time!
Sunday, May 27, 2012
Sorry...again!
So sorry guys! It has been such a crazy past couple of weeks! With the end of school year coming and all the end of year tests, I haven't had much time, plus I have been busy every weekend with going out! I promise to post something new soon! If nothing else, show how to make something with gum paste (: I hope everyone is having a great beginning of summer! Stay cool! (:
Sunday, May 20, 2012
So sorry!
So sorry I haven't been posting! I have been very busy so I haven't had the time to bake, will try to get one up by the 28th. Will try! Thanks for your patience!
<3
<3
Sunday, May 6, 2012
Petite Fours (Fancy Mini Cupcakes)
Hello! So this is my first real post! Woo! Anyways, so I decided to do Petite Fours, which to me are just fancy mini cupcakes. Here is the image of things you will need : (Another list at the bottom!)

I know, I cheat. I use cake mix. I am hoping to make my own some day but, this is cheaper right now. The cake mix, the things to make the cake mix (water, eggs, and oil), vanilla icing, mini cupcake liners, regular liners for extra batter, food coloring, an icing bag and a size 3-5 tip. Any (3, 4, 5) will work for this. If you don't have that, then 1/16 inch cut out of the corner of a decorating bag, Ziploc works too but it may leak out of the top if you don't hold it correctly.
Mix the batter to the directions on the box, will vary with each type of mix, until it's nice and creamy. My family prefers yellow cake, but you can make this with any type of cake. If yellow cake there shouldn't be any powder left of the mix, which you will see because it will be white compared to the yellow color. Using an electric mixer works better then by hand, and goes quicker.

Fill the mini cupcake liners 2/3 of the way, using a small ice cream scooper works the best, but if you don't have one, it works just as well with spoons, may take longer though. I filled 24 of them and split the rest into regular sized cupcakes. You can do that or do all mini. After all the liners are filled, bake, since they are smaller they don't take as long as larger cupcakes. Depending on the oven it may take roughly 10 minutes. Just don't leave the cupcakes alone, they could burn. I put them in for 5 minutes and went from there. In the end it took me 12 minutes. Just make sure you keep an eye on the cupcakes.

When done they should look something like this. Another way to test, stick a tooth pick in the largest one and if it comes out clean, it's done. It should also be golden on the top. (They are soo cute! Super tiny!)
Next, you get your tub of icing, take 1/4 of the container and separate it, set to the side to use later. Split the remaining icing into four bowls. Make sure they are a little deep, but you won't need large bowls, just a small one, roughly 1 cup bowl.

Put in ONE drop of your dye into the icing. Add another depending on your preference and what you are making them for. Mix in the color and add one drop at a time until you find your preferred shade.

Here are two of my colors mixed up. I love the shades, may be a bit 'electric' for a more fancier event though. I did pink, blue, green, and purple, I also used Duff Goldmans food coloring, which, you can get at Michael's. (I love Duff. He is my idol (: ) If you made 24 mini, then you will have six of each color. Set out a cookie sheet covered by parchment paper. Work one color at a time. Take the first color and microwave for five seconds, stir, and if, when you remove the spoon the icing dribbles down like a light fluffy whipped creamy texture, if not, microwave for 4 more seconds then stir. Repeat that until the right texture. But be careful, icing could ruin if microwaved too much.
Take the cupcake by the liner and dip the top in the now slightly soupy icing to the rim of the liner, lift it straight up and wait until the icing stops dripping and flip over. Set down on the cookie sheet and keep working through each color and each cupcake. Remember: One color at a time and also remember: 4 colors, 6 cupcakes per color.
Put your tip in the bag (or cut the tip) and cut a little of the tip of the bag away so the tip you use is nice and snug. Put the non colored, white, icing into the bag carefully, DO NOT SQUEEZE THE BAG! It will come shooting out if you do. Decorate each color with one design, you can do anything, just keep it simple. Here are mine!

For pink, one dot, for blue a squiggle, for purple three lines, and for green three dots. Here are my larger cupcakes!

Yes. They do say eat me. I had to...I am an Alice in Wonderland nerd and had to. Besides, I had extra icing so I decorated them accordingly.
If you want to send me your tries, please do! I will love to see them! Any questions please ask! I will be more than happy to answer. Thank you!
(Remember this is my first cupcake post and bare with me! I will try to do better each post! Plus I forgot to take pictures when decorating so I will try to get better with that next post!)
See you next post! (:
Ingredients:
-Yellow Cake mix
-Things to make the mix
-Vanilla icing (one tub will work)
-Food coloring
-Decorating bag
-Size 4 tip
-Mini cupcake liners
-Larger liners *optional*
Subscribe to:
Posts (Atom)