Tuesday, October 2, 2012

Baby Shower Cake


Okay, let me start off by saying that I do not like this cake, everyone else does so...what ever. I see a lot of issues but that's just me, a perfectionist. I will list what I did wrong and how you can fix it and not make the same ones I did. Okay, really quick before the rest though, I do like the cake, I am just hard on myself and I see some issues and get harder on my self.

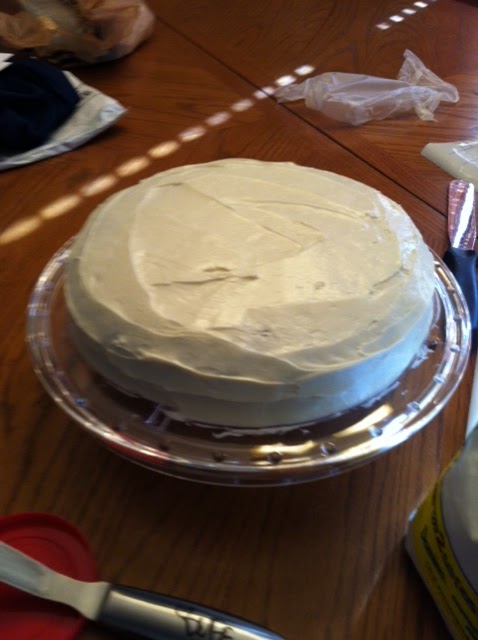
Okay. well here is the cake...


Okay, well, first off, I used white cake mix, dyed it blue because my sister is having a boy. I covered it with a white cloth as it cooled and as I worked on making some other things before actually cutting and placing them and decorating them. Yes that is a tip of mine, cover it with a cloth to keep any bugs and to keep it moist.

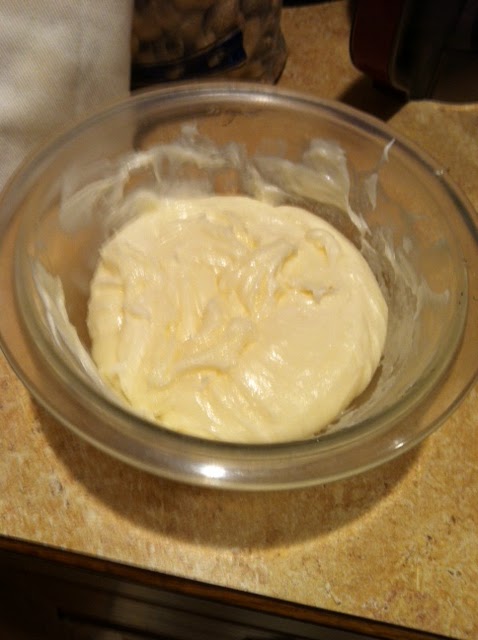
Now, I used the marshmallow fondant from a few posts ago and the first one really messed up. It was super soft and I honestly have no idea what happened. My tip for if this happens, trash it. Start again. It's not difficult to make so just make again. I wish I did because when it was time to use that soft fondant, it sank and looked bad. Like it was melting even though it wasn't, it was just so soft it was sinking. I also suggest making the fondant a couple days before you work on it just so that you have it done and out of your way.

If you find that the size of cake you want to make, that there isn't a square for it and that there isn't a pan for it, get knives. Cut the cake down to the size you want and cut the card board down to the size of your cake with a sharp, SHARP, knife. As I personally was doing this my uncle was so worried that I was gonna cut myself, then again, he is weird and thinks I am still twelve and need adult supervision when I use something sharp. And, yes, I did it by MYSELF, not one cut.

If you don't have a manly man to cut dowel rods to size, than use a gerber knife thingy and the plier part on the top has like a pair of scissors in them and use that cause they aren't thick. That's all that is needed on the dowel rods, if you really need more about it than comment and I will get into more detail about it.

PRACTICE when you make a little figure before hand. Tooth picks and decorating tools by Wilton are great for adding detail. Just get handy and use what you have, tooth picks are especially awesome for the smaller detail. Also, tooth picks and edible glue (you can get it at Micheal's) are great for keeping a head to a body, or ears to the head. If you want me to do a specific tutorial on how to do any figure, just comment below and I will give it a go! (:

OH and make sure you know what each tip looks like when it comes out, BEFORE you actually use it. I did and I have yet to use a tip that isn't what I want.

I think that is it though, so....happy baking! (:

<3 Mega Cakes

Thursday, September 13, 2012

Reese's Cheesecake! Yum!

Okay, for starters, I am SO sorry this post has been slow, school started back up, it's been CRAZY, and to top it off MY laptop decided to basically become useless so I am on my dear brothers (thank you!) since he has a different computer with him. I don't exactly like this laptop but it WORKS, so, I am using it and am finally gonna post! So here is some awesome cheesecake! A combo of two yummy things, my favorite candy, Reese's and an amazing dessert, cheesecake, YUM!

Okay so, this cannot come as a surprise to you, but I found the recipe on pinterest. Here is the original, I kind of....yeah went my own way with some of this, but hey, it turned out fine! WARNING: This makes 2 pie's, cut the recipe in half to get one.

Step 1: Gather all of the ingredients: Chocolate pie crust (x2), 2 lbs cream cheese softened, 5 eggs at room temp, 1 1/2 cups brown sugar (packed), 1 cup smooth peanut butter (NOT natural-style), 1 tsp vanilla extract, 1/2 cup whipping cream, and 12 reese's cups.

Step 2: Make the filling:

Beat the cream cheese until fluffy, no really, do this. It make seem stupid, but do it, it really does help.
Next, add one egg at a time, mixing well after each.
Add the brown sugar, peanut butter and whipping cream, mix well.
Stir in the vanilla and then fold the peanut butter cups in with a rubber spatula.

Step 3: Pour into crust pans, now the fun part....

Step 4: Get out a cookie sheet and fill with water about half way up (The pan MUST have a lip to it) and then place the pies in the water.

Step 5: Bake at 275 degrees for about an hour and a half, check it after an hour though just to make sure all goes well. It should be lightly golden on top and firm.

Step 6: Refrigerate for at least 4 hours. I did it over night.

Step 7: Decorate, I personally did this : Drizzled chocalte syrup on the plate, then placed a slice on it. Then drizzled more on top and cut up a reese's cup and put it on top.


Okay, no new post until later this month early next because I am going to be planning and making a major cake! I will try and do pics of how to make some of the things, maybe, if people want to, I can maybe do a video? I don't know, I will decide by then. Make sure to check out my facebook page! 

Monday, August 20, 2012

Red Velvet Hunger Games Cake

Okay, I am just putting it out there now, I LOVE The Hunger Games, all the books and now, the movie. So, in honor of it coming out on DVD (Which my daddy bought me on it's release day, the 4 disk special edition set!) I decided to make a cake. Which, this is NOT what I posted on facebook, that will be coming later, maybe next week or so. Sometime after the cake is eaten. Anyway, it's a Red Velvet cake with vanilla butter cream and the marshmallow fondant I made a post a go.

Now, I didn't make anything fancy or special so there really isn't a recipe. I have done the butter cream and it's box mix, and I showed how to do the fondant, so, what am I going to do? Tips! :D

Okay, I was a dummy and didn't think to print out a template to use for the pin....so what should you do? Print out a template. Which really is, just find a outline of the image, print it out to the size you need DO NOT JUST PRINT, you should figure out what size you will need, and fix the image to the size you need. Once it's printed, cut away all the undesirable pieces until you do have an outline. Roll out the fondant, place the template on top of it and cut away all the undesirable pieces of fondant, I just used a plain kitchen knife for this.

If you forget, or just don't want to kneed the color into the fondant (If you didn't color it before hand like the site for the fondant says to do...) just get a little bowl, squirt some drops of liquid fondant (NOT GEL) into it, and using a paint brush (I bought a set for baking, all clean and ready for use on cakes, they were also the little cheap ones, they still get the job done, no need for fancy expensive stuff!) paint on the color! I recommend doing this before you put it on the cake, letting it dry and then placing your image on the cake. Using a spatula or any thin flat surface would work, to help assist if need be.

Use a tooth pick to trace, do it. It will give you an idea before you make anything permanent, maybe even do just water, that will wipe away, or powder sugar, really anything that will wipe away, just don't do food coloring to outline, you might mess up and then you will have a spot on your cake.

Use your resources, I can't draw a straight circle to save my life, never have, so, I found a bowl that had the outer rim size that I needed and put it on my fondant and traced that.

Don't get frazzled, I don't know how much I can stress that. DO NOT GET FRAZZLED IN THE KITCHEN! It just leads to messes. The one time I got frazzled in the kitchen I messed up icing. Added like 8 times the butter I needed and like 3 times the shortening I needed, it was BAD, I had to start all over, those ingredients, gone, wasted. It sucks, don't get frazzled, it leads to messes and accidents and just makes your day/night bad.

Have fun, play some music and just relax, if you are in the kitchen baking or decorating, just have fun, the sky is your limit with it. You can make or do just about anything you want! Seriously. Just google _______ Cake, there is bound to be something someone made. I have seen cakes that don't even look like cake, they look like a sculpture that belongs in a museum. That is how funky you can get with cake, just have fun and if you mess up, laugh about it, don't get discouraged, everyone messes up, I know I have plenty.

Now for my cake!

It didn't turn out exactly the way I wanted, the Mocking Jay pin should have been better but what can you do? I was dead tired so here we go. 
This is just the top, it has my favorite quote "May The Odds Be Ever In Your Favor", and the pin, which both need work, I don't have the best penmanship and I should have printed a template. But it's too late and this is what it looks like, which isn't terrible, I have seen worse cakes. 

If have any questions or something you want to see me make, or want to know if I can find an easier way to do, just comment on here or on my facebook page, I am bound to be on and see it! Thank you!

Mega Cakes<3

Sunday, August 12, 2012

Facebook Page!

Hello! I made the facebook page last night but never posted on here. Here is the link if interested. I have posted my finished products of stuff I made, even before the blog. Also, a simple logo, temporary until I can make something better. So yeah, check it out! (:

Saturday, August 11, 2012

Snicker Doodle Cupcakes with New Fondant Recipe

Okay, the title explains what is going on, I am making a Snicker Doodle cookie into a cupcake, okay, it's NOT my recipe, it's from a recipe book that you always see when in the checkout lines at most grocery stores. Well, I have like 4 of those and saw this one and was like, "Yummm". So, went to the store a couple days ago and got everything for that. However, I wanted to decorate it and I also need to try out a new recipe for fondant to find one my sister will like (I am making her baby shower cake!). So, I decided to make that to see if she will approve, which meant, back to the store. Well, my mom went, I stayed home and watched the dog.

Anyways! I got the recipe from pinterest (Big surprise there!!) and it's a marshmallow based one, supposedly way better than the Wilton stuff I buy. I like it but no one else seems to...oh well. Besides, this is WAY cheaper in the long run, so, why not try it? Here is the link, ignore the Royal Icing part, just scroll down a little. Again, I am a terrible person and I forgot pictures, but next time I make it I will post pictures. (Although, the link has pictures so I don't really need any....do I?)

Any-whoo! A few tips when making this, Almond Extract SMELLS. Okay, that isn't a tip, it's my opinion. But it does, it smells, but it works and is what is called for. I personally wished I wasn't wearing a tank top so I could pull my shirt over my noise, but what ever. (It's kinda like a nasty medicine smell, but what ever works, right?) So, two 'capfulls' I think I poured a little too much, but we will figure that out when I have more than a nibble of it.

Right, tips, when it says spray the mixer, it means SPRAY IT. I dont think I did a well enough job of that because the powder sugar STUCK. But, what can you do? It still turned out alright. Oh and before you begin, 13.5 oz of un-melted marshmallows is 6 and 3/4 cups of un-melted marshmallows. Just in case you couldn't find a bag of that size and was lost and confused like I was and end up needing your fathers help....

Uhm, don't be impatient, slowly add powder sugar, don't do too much at a time, I would say like a tablespoon at a time, I just dumped a bit in at time but if you want a measurement, there you go. It takes time, so be patient. Have a couple spoons ready to scrape the edges of the bowl if powder sugar sticks.

If people have too many issues with this, but you want to try it, just let me know and I can try and maybe do a video or something to help out. Or do photo by photo of what I do, or something, I want to help you! This is  a much cheaper solution to fondant, and it stores for 3-6 months, who doesn't need that?? Besides, it makes a decent amount. I have a nice size log sitting on my counter right now. In all, I give it a thumbs up that it works, and its light and fluffy, and besides, MARSHMALLOWS, what more convincing do you need? I mean really....Okay, onto the actual cupcakes now!

*NOTE* I went to make the cupcakes and realized I had the wrong cake mix so I just made do, I wont post the actual recipe but if you really want it, just let me know...but I like my recipe (:


Ingredients:
Cupcakes
French Vanilla Cake Mix
3 Eggs
1 1/3 cups Water
1/3 cup Canola Oil
2 1/2 tsp Cinnamon

Icing
3/4 cups butter
1 tsp vanilla
3 tsp Cinnamon
5 3/4 cups Powder Sugar
3-4 tbs milk

Steps 

1. Preheat oven as directed on the box, mine was 350, put the liners in cupcake pans, my batch made 21.
2. Put all the cupcake ingredients in a mixer, follow the steps normally for making the mix, but add the cinnamon with it.
3. Bake for the time on the box, insert a tooth pick and when it comes out clean, they are done.

4. After they are mostly cool, make the icing, here is how.
5. Beat the butter until it is fluffy. (Don't skip this step.)
6. Add the vanilla, cinnamon and powder sugar and mix.
7. Stir in the milk for desired consistency. (I did 3 1/2 tbs)

8. Decorate! Pipe or spread, how ever you like, the icing on the cupcakes.
9. Make what ever you want from the fondant to put on it, me? I am making flowers! (Simple ones, clean white flowers)


Wednesday, August 8, 2012

I suck as a blogger...

I suck as a blogger, but hey, that isn't my proffesion, so, don't like it, go away. I haven't been able to make my cupcakes due to a plan change, I decided on making a thing to go with them but I didn't have the ingredients either. Got them but decided to make it this weekend, but because I love you, I will post soon after making them. But in the meantime I made a Dessert Pizza, Apple flavoring! I forgot to take pictures....SO, I am just gonna send you the link to where I got it, See!. It's really yummy, reminded me of the dessert pizza from either Pizza Hut or CeeCee's Pizza. Either way, it was really good. Only thing is, when I made the icing on top, I used about 4 tbsp of milk instead of 2-3. And I used a original size crust, not thin....but it still turned out great. SUPER easy to make, not a whole lot of ingredients, and just not hard in general to make. I am sorry for being a bad blogger, but I am working on it!! Just so you know, I found this pin on Pinterest...that place is ADDICTING!!

Here is something for everyone to know, when I make it to 200 page views (I am at 196!!) I will make a 'like' page on Facebook! I hope you will like me, I will post on here when I make it! I think that is it...Bye!!

--MegaCakes

Saturday, August 4, 2012

New Post COMING SOON

Okay, I know, I suck, I said I would post this week and it hasn't happened. I was planning on baking this weekend but I am super busy this weekend and thus, no time. I am however free on Monday (As far as I know anyway...) So I plan on baking that day, SO, expect a post around mid week, the end at the latest. I PROMISE, I PINKY promise, those are legit. Anyway, this one looks super promising, and if it doesn't work, I will still post, give tips of some sort, cause I hope to decorate or something along those lines. Remember, I feel I am a very novice to baking and decorating, so, I feel I am more of a tip and such giver for beginners as well. I want you to learn along with me, and I know not everyone has all the tools that I have, and I don't even have everything I would like to have, but I know you can still work without those tools, just a cookie cutter, a knife (preferably 2 butter) and your bare hands and creativity, you can make something fantastic. So, please, just wait until next week! I hope to post more often (as long as I am not busy, although, school is going to be starting soon and I will have a LOT more to do this year than any other...) So, see you all in a week!! <3 Happy Baking!!!!

--MegaCakes

Thursday, July 26, 2012

Hello!

Okay, so I had made some cupcakes a bit ago and they just sucked. It was a cotton candy cupcake and I just really did not like them. SO, I am on the hunt (on pinterest...) for a recipe for a cupcake, I know how I want to decorate (Not telling!!) But I don't want a boring yellow cake, so, if you have any ideas or anything you want to see me make, just let me know! (: I don't want to disappoint anyone or anything and I haven't forgotten you! I hope to have something at least MADE by the end of next week. In the mean time...

Remember, if you make anything I made, or make something that you want me to see, don't hesitate! Let me know! Show me! I want to see (: (Please, also remember, I am not a professional. I am only a beginner, showing off my love of baking. I want to share my passion! <3) 

Sunday, July 22, 2012

Apple Fritter Muffins

Okay, so my mom found this recipe on Pintrest (We're addicted to that site!!) and she said that she wanted me to make them. So, I did. The original recipe is here and if it's yours and you want me to remove this, just let me know and I will.

Anyways, we didn't have Granny Smith apples, we had Golden. So I used that and lowered the amount of sugar put in. Well, here is the recipe with my modifications (If using any apple other than Granny Smith, you should lower the amount of sugar from the original recipe, or, it will be really sweet.)

For the apples:

2 Large Golden Apples, diced
3 TBSP butter
1/4 cup granulated sugar
2 TSP cinnamon
2 TBSP water
1/3 cup flour


  • I sliced and cored the apples then cut the skin off before I diced them. This is very time consuming so make sure you plan ahead for this part. 
  • Next, add all the apple ingredients into a skillet, except the flour. Cook over medium heat until the apples are tender, I tested with a knife, like potatoes. This takes roughly ten minutes to cook. 
  • Add the flour and stir it in, once stirred leave on for about a minute, let the taste of the apple kind of cook off. Then remove from the heat completely. 
For the muffins:
2 Large eggs
1/4 cup applesauce
1/4 cup canola oil
1 cup granulated sugar
1/3 cup brown sugar
1 tsp vanilla extract
2 1/3 cups all-purpose flour
1 1/2 tsp baking powder
1/2 tsp baking soda
3 tsp cinnamon
1/2 tsp salt
1 cup buttermilk
  • Preheat oven to 400 degrees F
  • Line 18 muffin cups with any liner
  • In a medium sized bowl, whisk together the flour, baking powder, baking soda, cinnamon, and salt.
  • In an electric mixer (You can do this in a large bowl by hand if need be) beat together the applesauce, oil, granulated sugar, and brown sugar until it is smooth. Beat in the eggs one at a time then add the vanilla and mix thoroughly.
  • Next mix in the the flour mixture and the buttermilk. (The site says to alternate, but you don't have to) Once combined completely, gently STIR in the apples (Do not mix in!!)
  • Spoon the batter into the cups (if you have a round ice cream scoop, that will work well, more evenly) 
  • Bake until the muffins are pale golden on top, roughly 15-17 minutes, rotate half way through. (A tooth pick doesn't really work in the situation because of the apples)
  •  
  • Cool for a couple minutes until you can pick them up and then place them on a wire rack and let cool four about 10 minutes.
For the Glaze:
2 TBSP melted butter
1 cup confectioners sugar
1 TSP Vanilla
1 TBSP hot water
  • Mix together all ingredients in a medium bowl and whisk until smooth.
Once the muffins have cooled their time, and the glaze has been made, dip in and serve. What I did was I let them cool a bit and then dipped them in once (That's all I could do with the amount of glaze I had) and set them on a plate (Warning: The glaze will drip down the cupcake liner, that's why it needs to be on a plate after glazing, of course, unless you want glaze all over the counter). I didn't wait long for them to cool because I like a warm muffin.

Again, this is NOT my recipe, I found it, made it, and had to share with my modifications! These muffins were so yummy! Here is what mine looked like :

(I have no idea why some of the stuff is in a different color but just ignore it, the information is still there!)


Sunday, July 15, 2012

NEW POST--COMING SOON!!

Okay, I know I have been slacking a bit, but, I made a muffin this morning from a recipe my mom found on Pinterest (I am addicted to it!!) and it was YUMMY, so, I will post it and any tips and tricks I have for you when making them. So, expect that to come soon!!  I will also post a link to the actual recipe I found so you can use it, seeing as they deserve the credit for it for coming up with it in the first place!!

Tuesday, June 19, 2012

Happy 50th Anniversary

Okay, so here is my new cake! I made this for my grandparents surprise 50th Anniversary party. So here it is!


I made everything except the gold ribbon around the bottom, the 50 topper and the cardboard (duh). Now some tips for those making anything like this. 

Tip #1 : Bake the cakes and as they cool (take out of pan before they cool too much or they will stick to the pan!!) make the flowers. 
Tip #2 : Practice making the flowers before you make the cake, Practice, practice, and more practice. 
Tip #3: Buy a gum paste flower making kit ( I recommend one by Wilton, you can get it at Michael's ) 
Tip #4: Research how others make the flowers. I found a couple different ways to make one type of flower so do the research on the flower you plan on making. Also, try to make it as real as possible (unless making a more cartoon style cake or something)
Tip #5 : Buy some sort of tool kit for making cakes (Again, Wilton has some really nice ones) 
Tip #6 : Buy premade gum paste and fondant. It will save you tons of time!! 

This cake would be for more elegant events and for more advanced people, but, if you follow my tips, you can do it, just make sure you practice, even on smaller cakes before you do this type if need be. If you have any questions just comment and I will get back to you as soon as possible. (: 

Sunday, June 17, 2012

Hello!

New post will be up this week, it wont be as detailed or have as much a 'how to' thing to it though. It's mostly to just show, but I do have some tips for if you want to make something like I made. A tip for now- practice, practice, and practice!!! Will post sometime in this upcoming week! I promise (:

Tuesday, June 12, 2012

Carrot Cake made FANCY (:

Well, here is a new post! I made a carrot cake with cream cheese frosting and a new 'fondant' recipe, it's super simple and tastes great! (Although, tips to come on how to work with it!)

Here are the ingredients you need : Your favorite Carrot Cake Mix (I used box because that's a lot of work to make it by scratch, but you can if you want!), Cream Cheese Frosting, 12 oz. White chocolate candy melts, Light corn syrup, and corn starch. 

Okay, I started making the fondant because you have to let it sit for an hour. (This is NOT my recipe, I tried it from the Better Homes and Garden magazine) 


Step 1: Melt the bag of White Chocolate Candy Melts by cooking for 20 seconds at a time, DON'T COOK TOO MUCH! Stir after every 20 seconds until melted, don't over do it!! **Tip: It should take about 1 minute in total**

Step 2: Mix with 1/3 cups light corn syrup in a separate bowl and cover with plastic wrap TIGHTLY and let sit on the counter for at LEAST an hour. 

***To color will come later!***

Now, make the carrot cake following the instructions on the back. Put it in your pan, I used a ten inch round pan, so baking time differs, but the back of the box should say depending on your pan. If not, then bake for 10 minutes and check by inserting a tooth pick in the middle, if it comes out clean then it is done. If not, then keep cooking it for about 5 minutes and check it again. I used a ten inch round and it took roughly 20 minutes. But keep with the ten minute and then five at a time tip. 

Once done baking, take it out of the pan **Careful! Pan will be HOT** You can let it cool before you do this, but don't let it cool completely, or it will stick to your pan! That is why I do it as soon as it's done. Let the cake cool COMPLETELY now. 


Once that is done cooling, cover the top and sides in the cream cheese frosting and set aside. Time to cover in the candy clay/fondant!


Place the candy clay on a lightly dusted corn starch surface, I use a wilton rolling mat. Knead it until it's nice and pliable, but not too much, remember, it's still chocolate so it can melt and get sticky!! (Thats why I use corn starch, keeps it from being sticky if used right!). Now, if you want to color it, use a tooth pick and add a little at a time and knead it until fully mixed, and keep adding until you get the shade you want. You don't have to color it, I didn't. 

Roll it out on the corn starch dusted surface until it is thin. Now comes the harder part. This took me two tries. If it's too warm and you played with it too much, it may tear, so, BE PATIENT! You get frustrated and flustered, it won't work. At all. Trust me, I know that first hand. Once rolled, I used a icing spatula and took it and scraped under the candy clay because it may have stuck a little. I used both arms (don't be afraid to get dirty!!) and lifted it and QUICKLY centered and laid it on the top of the icing covered cake. 


Now, this part you also need to go quickly. Cut off any extra pieces or it will weigh it down and tear. Smooth it down on the icing, trying to not get any seams. I have a wilton fondant smoother tool and use it, I love it, works GREAT! Especially for the sides of the cake. Anyway! after smoothing it, trim the sides again, making sure it's as close to the bottom as possible. Now, the decorating part is up to you! I just added little things from this mold I have to just test it out. I wanted to see how well it worked so I just kinda placed some things here and there. 


I stuck my cake in the fridge and it was still alright, the chocolate does have the syrup in it so it doesn't completely become solid. Note: If you make a larger cake, double the one and a half the recipe for the fondant/candy clay.


NOTE: I know my writing may not be the best, I am not a fancy published author or anything so, if you have questions, feel free to comment! I don't bite! I will answer! Or just comment to comment, let me know if you tried it and how it went!! (: 

Thanks! See you next time! 

Sunday, May 27, 2012

Sorry...again!

So sorry guys! It has been such a crazy past couple of weeks! With the end of school year coming and all the end of year tests, I haven't had much time, plus I have been busy every weekend with going out! I promise to post something new soon! If nothing else, show how to make something with gum paste (: I hope everyone is having a great beginning of summer! Stay cool! (:

Sunday, May 20, 2012

So sorry!

So sorry I haven't been posting! I have been very busy so I haven't had the time to bake, will try to get one up by the 28th. Will try! Thanks for your patience!

<3

Sunday, May 6, 2012

Petite Fours (Fancy Mini Cupcakes)


Hello! So this is my first real post! Woo! Anyways, so I decided to do Petite Fours, which to me are just fancy mini cupcakes. Here is the image of things you will need : (Another list at the bottom!)

I know, I cheat. I use cake mix. I am hoping to make my own some day but, this is cheaper right now. The cake mix, the things to make the cake mix (water, eggs, and oil), vanilla icing, mini cupcake liners, regular liners for extra batter, food coloring, an icing bag and a size 3-5 tip. Any (3, 4, 5) will work for this. If you don't have that, then 1/16 inch cut out of the corner of a decorating bag, Ziploc works too but it may leak out of the top if you don't hold it correctly. 

Mix the batter to the directions on the box, will vary with each type of mix, until it's nice and creamy. My family prefers yellow cake, but you can make this with any type of cake. If yellow cake there shouldn't be any powder left of the mix, which you will see because it will be white compared to the yellow color. Using an electric mixer works better then by hand, and goes quicker. 
Fill the mini cupcake liners 2/3 of the way, using a small ice cream scooper works the best, but if you don't have one, it works just as well with spoons, may take longer though. I filled 24 of them and split the rest into regular sized cupcakes. You can do that or do all mini. After all the liners are filled, bake, since they are smaller they don't take as long as larger cupcakes. Depending on the oven it may take roughly 10 minutes. Just don't leave the cupcakes alone, they could burn. I put them in for 5 minutes and went from there. In the end it took me 12 minutes. Just make sure you keep an eye on the cupcakes. 

When done they should look something like this. Another way to test, stick a tooth pick in the largest one and if it comes out clean, it's done. It should also be golden on the top. (They are soo cute! Super tiny!)

Next, you get your tub of icing, take 1/4 of the container and separate it, set to the side to use later. Split the remaining icing into four bowls. Make sure they are a little deep, but you won't need large bowls, just a small one, roughly 1 cup bowl. 

Put in ONE drop of your dye into the icing. Add another depending on your preference and what you are making them for. Mix in the color and add one drop at a time until you find your preferred shade. 

Here are two of my colors mixed up. I love the shades, may be a bit 'electric' for a more fancier event though. I did pink, blue, green, and purple, I also used Duff Goldmans food coloring, which, you can get at Michael's. (I love Duff. He is my idol (: ) If you made 24 mini, then you will have six of each color. Set out a cookie sheet covered by parchment paper. Work one color at a time. Take the first color and microwave for five seconds, stir, and if, when you remove the spoon the icing  dribbles down like a light fluffy whipped creamy texture, if not, microwave for 4 more seconds then stir. Repeat that until the right texture. But be careful, icing could ruin if microwaved too much. 

Take the cupcake by the liner and dip the top in the now slightly soupy icing to the rim of the liner, lift it straight up and wait until the icing stops dripping and flip over. Set down on the cookie sheet and keep working through each color and each cupcake. Remember: One color at a time and also remember: 4 colors, 6 cupcakes per color. 

Put your tip in the bag (or cut the tip) and cut a little of the tip of the bag away so the tip you use is nice and snug. Put the non colored, white, icing into the bag carefully, DO NOT SQUEEZE THE BAG! It will come shooting out if you do. Decorate each color with one design, you can do anything, just keep it simple. Here are mine! 

For pink, one dot, for blue a squiggle, for purple three lines, and for green three dots. Here are my larger cupcakes! 


Yes. They do say eat me. I had to...I am an Alice in Wonderland nerd and had to. Besides, I had extra icing so I decorated them accordingly.

 If you want to send me your tries, please do! I will love to see them! Any questions please ask! I will be more than happy to answer. Thank you!

(Remember this is my first cupcake post and bare with me! I will try to do better each post! Plus I forgot to take pictures when decorating so I will try to get better with that next post!) 

See you next post! (: 

Ingredients: 
-Yellow Cake mix
-Things to make the mix
-Vanilla icing (one tub will work)
-Food coloring
-Decorating bag
-Size 4 tip
-Mini cupcake liners
-Larger liners *optional*

Thursday, April 26, 2012

Welcome!

Hello! I am Mega Cakes and this is my cake blog! I will be posting a different cake each and every week, of course, unless it becomes a tad bit too much, then once every other week. And, for those critics out there, there will also be cupcakes, cause, they are cake too, just smaller.

 I love baking and baking is my passion, so, I decided to do this and share my passion. I am not a sales area, I do not sale cakes, I just will post the recipes and things that I use, any tips that I have, and, of course have my loving taste testers (family and friends) reviews of the cakes.

I hope people can find enjoyment or ideas from my cakes that I make. I want to share my passion with others. I want people, who aren't great at baking to find a good sight to get help, or for people who are great, to get some ideas to make their own versions of it.

If you have any comments or questions, post them, also, if you have your own ideas or photos of your copies of what I make, send them to me! I will be happy to see them! (:

Now, Mega Cakes, I bet you wonder where I got that. I am NOT a business, this is what I want my future business to be named, it's a combo of my name and well...Cake. So yeah, that is the origin to my name.

Will start posting cakes/cupcakes around May 5th, hopefully!

Thanks!
Mega Cakes